| build | ||
| demo | ||
| docs | ||
| lib | ||
| tests | ||
| .eslintignore | ||
| .gitignore | ||
| .npmignore | ||
| .travis.yml | ||
| bower.json | ||
| CHANGELOG.md | ||
| custom.d.ts | ||
| docker-compose.yml | ||
| karma.conf.js | ||
| LICENSE | ||
| package.json | ||
| protractor.conf.js | ||
| README.md | ||
| tsconfig.aot.json | ||
| tsconfig.json | ||
| tslint.json | ||
| yarn.lock | ||
ReDoc
OpenAPI/Swagger-generated API Reference Documentation

![]()


![]()
![]()
![]()


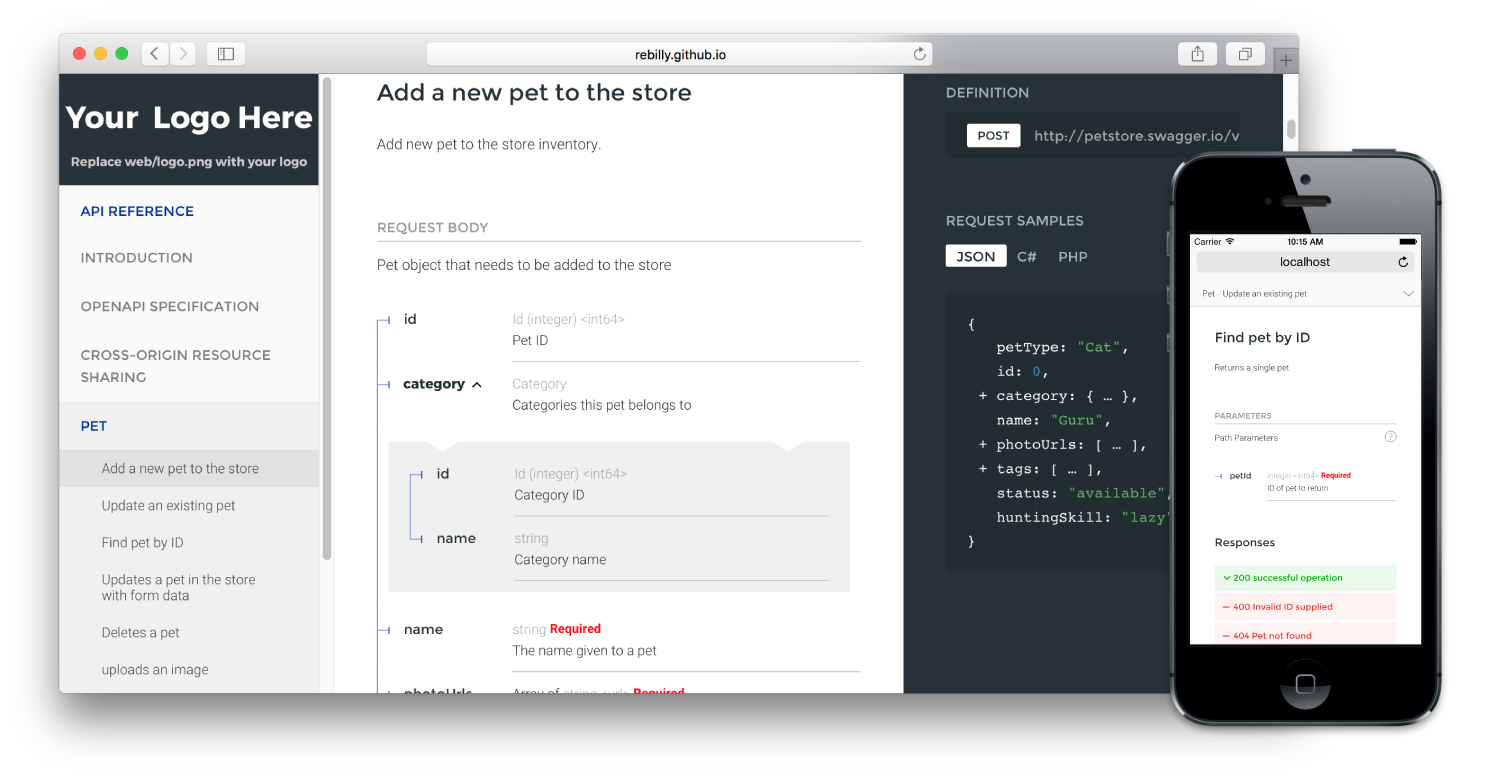
Live demo

Features
- Extremely easy deployment
- The widest OpenAPI features support (yes, it supports even
discriminator)
- Neat interactive documentation for nested objects

- Code samples support (via vendor extension)
- Progressive loading with
lazy-renderingoptions
- Responsive three-panel design with menu/scrolling synchronization
- Integrate API Introduction into side menu - ReDoc takes advantage of markdown headings from OpenAPI description field. It pulls them into side menu and also supports deep linking.
- High-level grouping in side-menu via
x-tagGroupsvendor extension - Multiple ReDoc instances on single page (example)
Roadmap
performance optimizationsbetter navigation (menu improvements + search)- ability to simple branding/styling
- built-in API Console
- docs pre-rendering (performance and SEO)
Releases
We host the latest and all the previous ReDoc releases on GitHub Pages-based CDN:
- particular release, e.g.
v1.2.0: https://rebilly.github.io/ReDoc/releases/v1.2.0/redoc.min.js v1.x.xrelease: https://rebilly.github.io/ReDoc/releases/v1.x.x/redoc.min.jslatestrelease: https://rebilly.github.io/ReDoc/releases/latest/redoc.min.js this file is updated with each release of ReDoc and may introduce breaking changes. Not recommended to use in production. Use particular release orv1.x.x.
Some Real-life usages
Deployment
TL;DR
<!DOCTYPE html>
<html>
  <head>
    <title>ReDoc</title>
    <!-- needed for adaptive design -->
    <meta charset="utf-8"/>
    <meta name="viewport" content="width=device-width, initial-scale=1">

    <!--
    ReDoc doesn't change outer page styles
    -->
    <style>
      body {
        margin: 0;
        padding: 0;
      }
    </style>
  </head>
  <body>
    <redoc spec-url='http://petstore.swagger.io/v2/swagger.json'></redoc>
    <script src="https://rebilly.github.io/ReDoc/releases/latest/redoc.min.js"> </script>
  </body>
</html>
That's all folks!
IMPORTANT NOTE: if you work with untrusted user spec, use untrusted-spec option to prevent XSS security risks.
1. Install ReDoc (skip this step for CDN)
Install using bower:
bower install redoc
or using npm:
npm install redoc --save
2. Reference redoc script in HTML
For CDN:
<script src="https://rebilly.github.io/ReDoc/releases/latest/redoc.min.js"> </script>
For bower:
<script src="bower_components/redoc/dist/redoc.min.js"> </script>
For npm:
<script src="node_modules/redoc/dist/redoc.min.js"> </script>
3. Add <redoc> element to your page
<redoc spec-url="url/to/your/spec"></redoc>
4. Enjoy 😄
Configuration
Security Definition location
You can inject Security Definitions widget into any place of your specification description. Check out details here.
Swagger vendor extensions
ReDoc makes use of the following vendor extensions:
x-logo- is used to specify API logox-traitTag- useful for handling out common things like Pagination, Rate-Limits, etcx-code-samples- specify operation code samplesx-examples- specify JSON example for requestsx-nullable- mark schema param as a nullablex-displayName- specify human-friendly names for the menu categoriesx-tagGroups- group tags by categories in the side menux-servers- ability to specify different servers for API (backported from OpenAPI 3.0)
<redoc> tag attributes
spec-url- relative or absolute url to your spec file;untrusted-spec- if set, the spec is considered untrusted and all HTML/markdown is sanitized to prevent XSS. Disabled by default for performance reasons. Enable this option if you work with untrusted user data!scroll-y-offset- If set, specifies a vertical scroll-offset. This is often useful when there are fixed positioned elements at the top of the page, such as navbars, headers etc;scroll-y-offsetcan be specified in various ways:- number: A fixed number of pixels to be used as offset;
- selector: selector of the element to be used for specifying the offset. The distance from the top of the page to the element's bottom will be used as offset;
- function: A getter function. Must return a number representing the offset (in pixels);
suppress-warnings- if set, warnings are not rendered at the top of documentation (they still are logged to the console).lazy-rendering- if set, enables lazy rendering mode in ReDoc. This mode is useful for APIs with big number of operations (e.g. > 50). In this mode ReDoc shows initial screen ASAP and then renders the rest operations asynchronously while showing progress bar on the top. Check out the demo for the example.hide-hostname- if set, the protocol and hostname is not shown in the operation definition.expand-responses- specify which responses to expand by default by response codes. Values should be passed as comma-separated list without spaces e.g.expand-responses="200,201". Special value"all"expands all responses by default. Be careful: this option can slow-down documentation rendering time.required-props-first- show required properties first ordered in the same order as inrequiredarray.no-auto-auth- do not inject Authentication section automaticallypath-in-middle-panel- show path link and HTTP verb in the middle panel instead of the right one
Advanced usage
Instead of adding spec-url attribute to the <redoc> element you can initialize ReDoc via globally exposed Redoc object:
Redoc.init(specOrSpecUrl, options)
specOrSpecUrl is either JSON object with specification or an URL to the spec in JSON or YAML format.
options is javascript object with camel-cased version of <redoc> tag attribute names as the keys, e.g.:
Redoc.init('http://petstore.swagger.io/v2/swagger.json', {
  scrollYOffset: 50
})
Development
Running local dev-server
- Clone repository
git clone https://github.com/Rebilly/ReDoc.git - Go to the project folder
cd ReDoc - Install dependencies
npm install - (optional) Replace
demo/swagger.yamlwith your own schema - Start the server
npm start - Open
http://localhost:9000
Alternatively, Docker can be used by just running docker-compose up.